How to Tune a Guitar Made Easy! [Guide]
Does your guitar sound more like a screeching cat than rock 'n' roll? Don't worry, every musician knows the struggle! A perfectly tuned guitar is the absolute foundation for a clean sound and pure playing fun. We'll show you the simplest methods step by step, so you can learn how to tune a guitar in no time – whether you're a complete beginner or have been playing for a while.
The Essentials of Tuning a Guitar at a Glance
Basically: The standard guitar tuning for a six-string guitar from the thickest to the thinnest string is: E – A – D – G – B – e. A simple mnemonic helps you remember it: Eddie Ate Dynamite, Good Bye Eddie.
Important: New strings in particular need time to settle and will go out of tune very quickly at first. Fluctuations in temperature and humidity can also affect your guitar's tuning.
Tip: When you're just starting out, a digital tuner (clip-on tuner) or a free tuning app on your smartphone is the easiest and most precise method to achieve perfect results.
The Basics for Every Guitarist: Standard Guitar Tuning (E-A-D-G-B-e)
Before you get started, you need to know which note each string should produce. Almost all the songs you know are based on what is called standard tuning. Imagine looking down at your guitar while holding it in the playing position.
The order from the thickest (top) to the thinnest (bottom) string is:
6th String (thickest): Low E
5th String: A
4th String: D
3rd String: G
2nd String: B (also referred to as H in German-speaking regions)
1st String (thinnest): High E
To remember this tuning, you can again use the well-known mnemonic:
Eddie Ate Dynamite, Good Bye Eddie.
With this knowledge, you’re perfectly equipped. Once you’ve learned how to tune a guitar, your journey as a guitarist can really begin. If you want to dive deeper into the world of the six strings, you'll find all the other basics clearly explained in our guide on learning guitar.
Learn guitar with music2me!
Do you dream of playing your favourite songs around the campfire or rocking out to the riffs of your heroes? With music2me, you can learn guitar at your own pace – step by step with a system that truly helps you progress, whether you’re a beginner or already advanced.
Over 400 video lessons & downloadable sheet music
Interactive tools like Skill Check & smart practice mode
Weekly live classes & personal teacher support
Exclusive Discord community for motivation & exchange
Discover guitar course now
Method 1: The Easiest Way for Beginners – Tuning with a Tuner
By far the easiest and most reliable method is using an electronic tuner, known as a clip-on tuner. These little helpers are inexpensive, simple to use, and extremely accurate. This method is particularly well-suited for guitar beginners, as their ears usually aren't that highly trained yet.
Here is how you do it:
Clip It On:
Attach the tuner directly to the headstock of your guitar. It picks up the vibrations through the wood, so it won't be affected by background noise.
Turn It On:
Switch the device on. It's usually pre-set to chromatic mode, which is perfect.
Tune String by String:
Start with the thick, low E string. Pluck it firmly and let the note ring out.
Read the Display:
The screen will now show you which note the string is currently playing and whether it's too sharp or too flat.
Needle to the Left / Note Too Flat:
Turn the corresponding tuning peg so that the string gets tighter. On most guitars, you'll need to turn it anticlockwise (from your perspective).
Needle to the Right / Note Too Sharp:
Turn the tuning peg to loosen the string. Usually, you'll need to turn it clockwise.
Needle in the Middle / Green Display:
Perfect! The note is spot on.
Repeat:
Repeat this process for all six strings (A, D, G, B, e) until the tuner lights up green for every string.
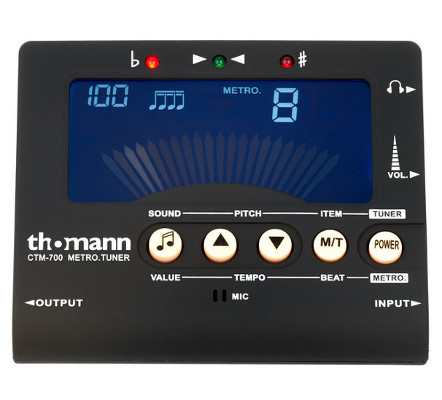
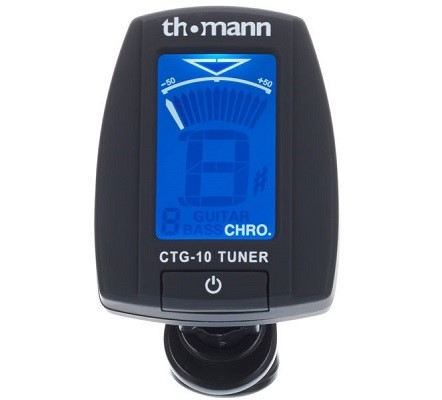
Buying a Tuner – Our Recommendation
If you decide to go with the tuner method, make sure to get a chromatic tuner. Only these can display semitones individually. Tuners are usually calibrated to standard tuning (E–A–D–G–B–e).
The way tuners work is relatively straightforward:
The tuner "hears" the played note via a microphone or pickup. The device then shows you whether the note for that string is too sharp, too flat, wrong, or correct.
We've picked out a tuner for both an acoustic and an electric guitar for you:
Method 2: The Modern Alternative – Tuning via Smartphone App
Don't have a tuner to hand right now? No problem! Your smartphone is a powerful tool. There are countless free tuning apps for iOS and Android that work using your phone's microphone.
It's that easy:
Download the App:
Search for "guitar tuner" in your app store and download a highly rated app.
Ensure Quiet:
Since the app uses the microphone, you should minimise disruptive background noise (TV, radio).
Launch the App:
Open the app and place your smartphone near your guitar's soundhole.
Tune the Strings:
Strike the low E string. Just like a clip-on tuner, the app will show you whether the note is too sharp or too flat.
Turn the Pegs:
Correct the tuning using the tuning pegs until the app shows that the note is perfect.
Go Through All Strings:
Repeat the process for the remaining five strings. Done!
Method 3: For the Trained Ear – Tuning without a Tuner
If you want to train your ear, you can also tune your guitar "relatively" to itself. For this, you only need a single correct reference pitch. You can get this from a tuning fork (usually the note A), a piano, or another instrument that's already in tune.
The 5th Fret Method Explained:
Get the Reference Pitch:
First, tune the A string (the second thickest) using your tuning fork or a piano.
Tune the E String:
Fret the low E string at the 5th fret. This note must now sound exactly like the open A string. Adjust the E string until both notes sound identical.
Tune the D String:
Fret the A string at the 5th fret. This note must sound just like the open D string.
Tune the G String:
Fret the D string at the 5th fret. This note must sound just like the open G string.
Tune the B String (Attention, Exception!):
Fret the G string at the 4th fret. This note must sound just like the open B string.
Tune the High E String:
Fret the B string at the 5th fret. This note must sound just like the open, high E string.
Method 4: For Pros – Tuning with Harmonics
This method is not only highly precise but also trains your ear for the finest nuances. Harmonics are bell-like overtones that you create by only lightly touching a string at specific frets (e.g., the 5th, 7th, or 12th fret) and plucking it at the same time.
How to tune with harmonics:
You’ll need a reference pitch for this too, to tune one string (e.g., the low E string) correctly. Afterwards, you compare the harmonics with each other:
Tune the A String:
Compare the harmonic at the 5th fret of the low E string with the harmonic at the 7th fret of the A string. Both should sound identical. Adjust the A string.
Tune the D String:
Compare the harmonic at the 5th fret of the A string with the one at the 7th fret of the D string.
Tune the G String:
Compare the harmonic at the 5th fret of the D string with the one at the 7th fret of the G string.
Tune the B String:
Compare the harmonic at the 7th fret of the low E string with the open B string.
Tune the High E String:
Compare the harmonic at the 5th fret of the B string with the one at the 7th fret of the high E string.
3 Tips to Optimally Tune Your Guitar
Stretch Your Guitar Strings
You’ve put on new strings, tuned them perfectly, and are ready to play, but suddenly the guitar sounds out of tune again.
This happens because the strings are still tightening slightly around the tuning pegs after being put on.
So, beat the back-and-forth cycle (restringing – tuning – playing – tuning) and stretch the guitar strings after you've strung them. To do this, grab the string around the soundhole or pickup and pull it gently upwards away from the body. Now you can tune the guitar. Afterwards, stretch and tune again.
Account for the Tremolo
If you're playing a guitar with a tremolo (whammy bar), you need to take a different approach when tuning.
Otherwise, as soon as you tune one string, all the others will go flat.
First, tune the low E string, then the A string, then the low E string again, followed by the D string and the A string. Keep going like this and you’ll save yourself a lot of frustration.
Check Your Guitar Before a Gig
Do you often stand on stage with your guitar? And every time, your stringed instrument sounds out of whack? Let your guitar acclimatise to the conditions of the venue.
It’s not uncommon for ambient heat (like from stage lights) to affect the tuning of guitars. Always check your guitar's tuning right before the gig.
3 Reasons Why Your Guitar Constantly Goes Out of Tune
Temperature Fluctuations:
Wood and metal react to heat, cold, and humidity. A chilly rehearsal room or hot stage lights can quickly throw your guitar out of tune.
Intense Playing:
Techniques like string bending or aggressive strumming put stress on the strings and machine heads, which can easily alter the tuning.
New Strings:
Brand-new strings first need to stretch and get used to the tension. Therefore, you'll need to retune them much more frequently in the first few days. Pro Tip: Gently stretch new strings after putting them on by pulling them slightly away from the fretboard. This speeds up the process.
How Often Should You Tune Your Guitar?
Ideally, you should tune your guitar before every playing session. But if we're being honest, that's rarely the case for most guitarists. However, you should definitely tune your guitar whenever it has been exposed to significant stress – heat, cold, or hours-long sessions. At the very latest, you should tune up before a rehearsal or a gig. Your bandmates and listeners will thank you!
Your Path to Perfect Sound
A tuned guitar isn't rocket science; it's a skill you'll pick up quickly. Make it a habit to briefly check the tuning before every practice session. This way, you're not just training your ear, but you're also ensuring that everything you play sounds correct and motivating right from the start.
With the right tuning at your fingertips and in your ears, nothing stands in the way of your musical success. Have fun playing.
Frequently Asked Questions About Tuning a Guitar
What is the standard tuning of a guitar?
The standard guitar tuning for a 6-string guitar is E-A-D-G-B-e, starting with the thickest string (low E) down to the thinnest string (high E).
How often should I tune my guitar?
Ideally, you should check the tuning before every time you play. It's a must after putting on new strings, after transporting it, and before any rehearsal or gig.
Why does my guitar go out of tune so quickly?
The most common reasons are new strings that still need to stretch, fluctuations in temperature and humidity, as well as intense playing using techniques like string bending.
Can I tune my guitar with my phone?
Yes, absolutely! There are many free and highly accurate tuning apps for smartphones. They use the built-in microphone and are an excellent alternative to a traditional tuner.
Is there a difference between tuning an acoustic and an electric guitar?
The standard tuning and basic methods are identical for both types of guitars. Additionally, you can connect an electric guitar directly to a pedal tuner via a cable, which completely eliminates background noise.